Django REST framework (CRUD Guide)
Welcome to this beginner-friendly tutorial on setting up a CRUD app using Django REST Framework!
If you’re looking to build a simple API that allows users to create, read, edit, and delete data, you’re in the right place. In this tutorial, we’ll guide you through each step of the process and provide clear explanations along the way.
Before we begin, it’s important to note that you don’t need to be an expert in Django to follow along. If you have a basic understanding of Django, you should be able to complete this tutorial without any issues.
By the end of this tutorial, you’ll have a fully-functional Django REST API that includes endpoints for creating, reading, updating, and deleting data. You’ll also have a better understanding of how Django REST Framework works and how to use it to build powerful APIs.
So, let’s get started and dive into the world of Django REST Framework!
To proceed with this task, you need to fulfill two important Rules:
Have a good understanding of ***RESTful API*** and its functionality, including how it works and how it can be implemented.
Possess a growth mindset and be willing to try new things, even if it means encountering errors and bugs along the way. Overcoming these obstacles is a natural part of the learning process.
Programming is an ongoing battle against bugs and errors, and the war will continue as long as we keep coding. However, if we were to stop coding altogether, we cannot survive in today’s technology-driven world. Therefore, it’s essential to be prepared for this battle, persevere, and strive to overcome challenges to succeed in software development
hooray lets start with creating a new project
what will we name for this project ?
let’s name it dump-it (an simple todo app)
before creating project initiate an virtual enviornment and install project dependencies in virtual enviornment.
If you’re not familiar with virtual environments, don’t worry — y**our friendly neighborhood developer Adnan Kattekaden, is here to help you out.
i will write another blog about that.
Step 1) Create a folder or directory for your project, using an underscore (_) instead of a hyphen (-) in the project name.

Step 2) Open your project folder with an Integrated Development Environment (IDE) such as Visual Studio Code (VS Code).
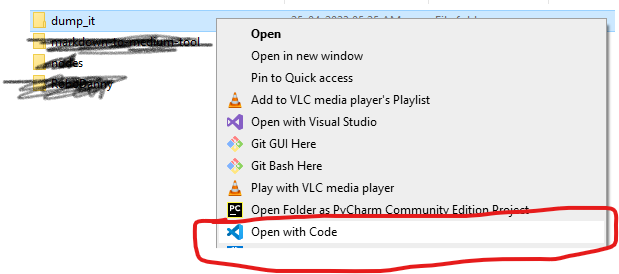
Step 3) Create a virtual environment for your project, and activate the environment.
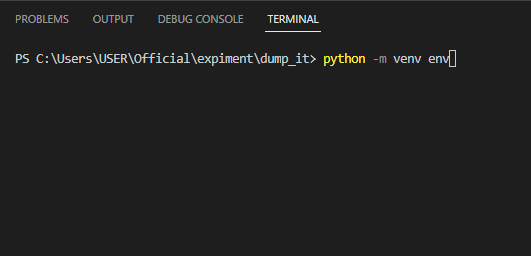
python -m venv env
To activate your virtual environment, enter the following command below:
.\env\Scripts\activate
Do you have any doubts about how to check whether your virtual environment is activated or not? Don’t worry, I have a helpful tip for you! 😉 But let’s keep it a secret between us, okay?

You’ll know that the virtual environment is activated when you see a green indicator on the right side. It’s that simple! 😊 And don’t worry, we’ll get back to our main topic now.
Step 4) Install the required dependencies for your project
pip install django pip install djangorestframework
Step 5) Initialize your Django project
django-admin startproject dump_it .
Note: When initializing your Django project with the command
django-admin startproject <project_name> ., the dot (.) has significant importance. Without it, the project will be initiated inside a new folder. To see how it works, give it a try yourself — but don’t forget to follow rule number 2!
I hope you were able to complete the task successfully. I have faith in you — you’ve got this, my friend!.
Step 6) Run your Django project

python manage.py runserver
After running your Django project, you should see a result similar to this

Step 7) Open your web browser and type in http://127.0.0.1:8000/ to view your Django project
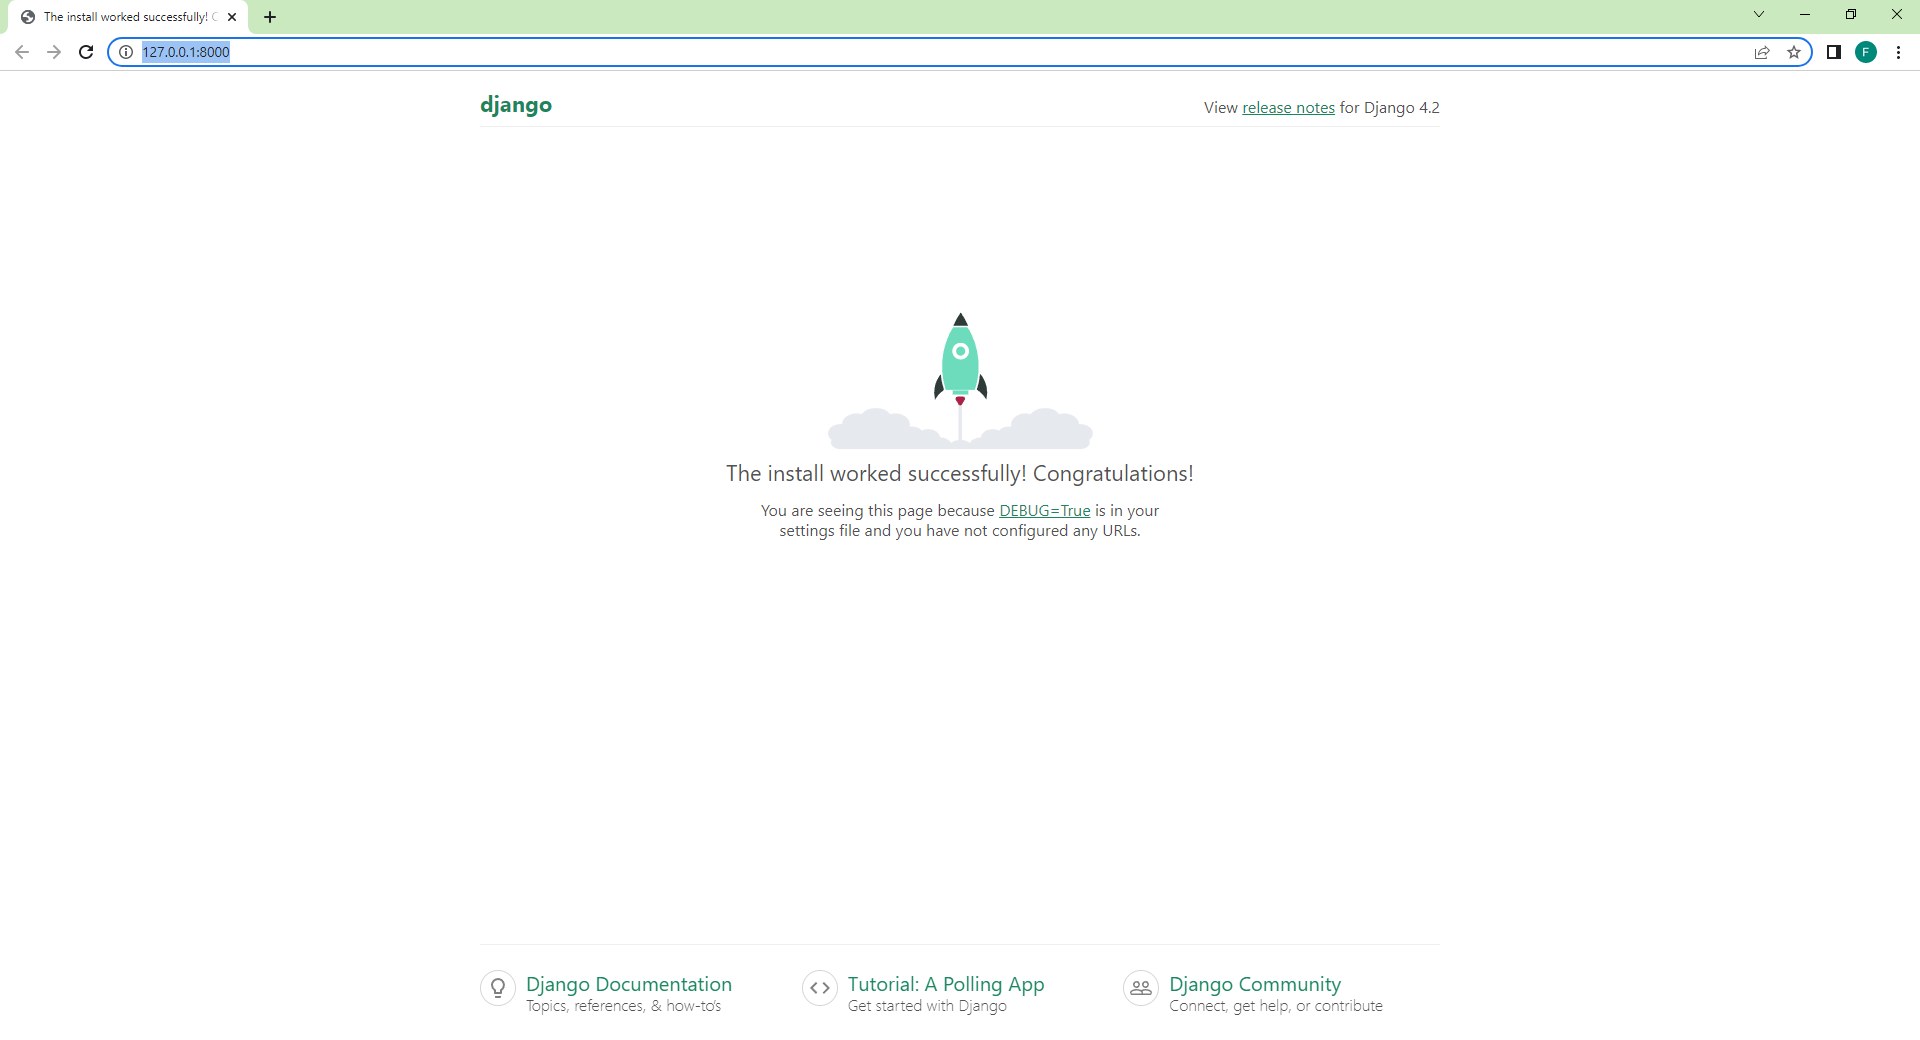
Congratulations! You have successfully initiated a basic Django project.
Now, are you ready to dive into the exciting world of APIs? I know I am! 💻🚀 Let’s get started! 🎉
Step 8) Let’s create a new app called ‘api’ for our project.
python .\manage.py startapp api
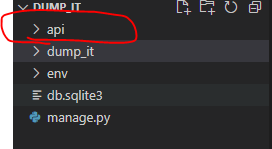
Great job! 👏 You have successfully created a new app called ‘api’. Let’s move on to the next step and keep the momentum going! 🚀
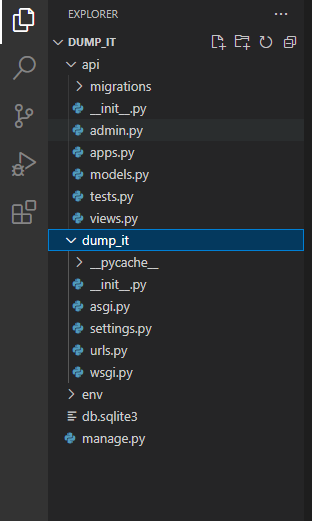
step 9) Add the ‘api’ App to the ‘INSTALLED_APPS’ List in ‘settings.py’”
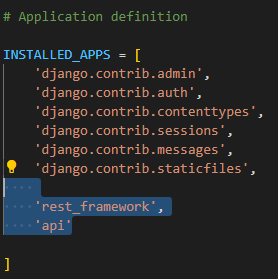
INSTALLED_APPS = [ 'django.contrib.admin', 'django.contrib.auth', 'django.contrib.contenttypes', 'django.contrib.sessions', 'django.contrib.messages', 'django.contrib.staticfiles',
#custom apps 'rest_framework', 'api'
]
step 10) open views.py file in api app
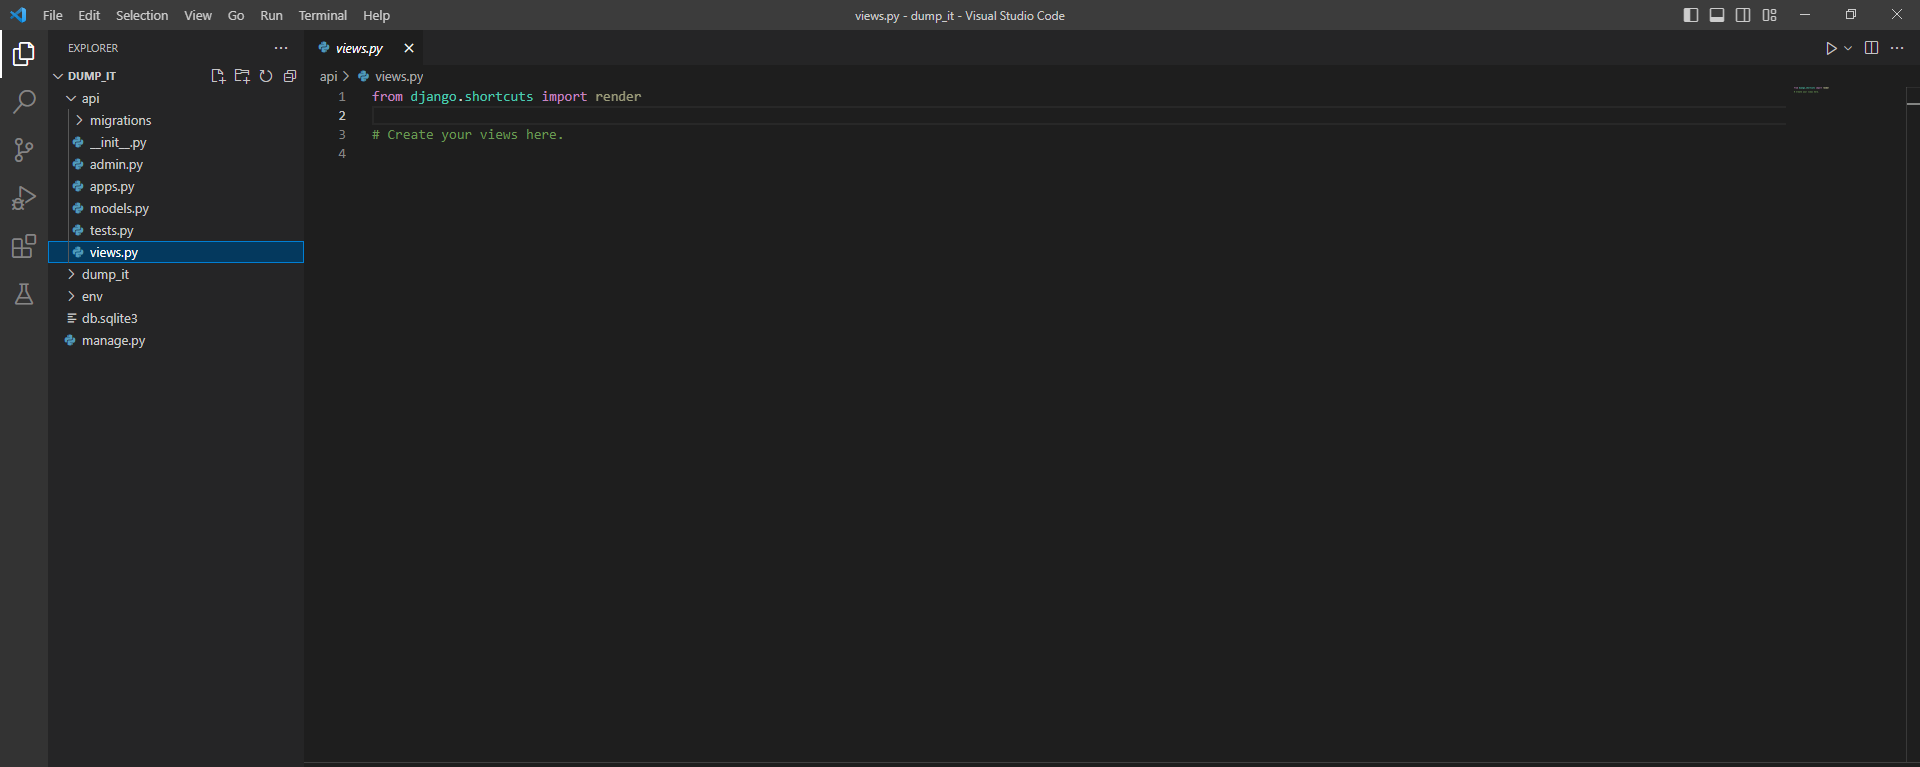
In this step, we need to remove all the imports in the ‘views.py’ file of the ‘api’ app and start writing our code from scratch.
Alright, folks! Have you completed the task? You did? That’s awesome, my friends! Now we can start the real fun stuff. Are you ready to dive in? Hoooreyaaaa! Let’s do this together!
step 11) write an first API request
Alright, it’s time to create our first API request in Django! This is where the real fun begins, so let’s get started!
Next, we will create a sample GET API. Follow the code and explanation below to learn how to do it.
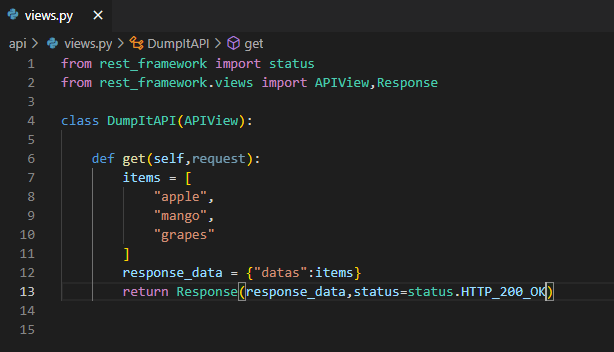
The status module is a collection of HTTP status codes that can be returned as responses from API views, such as 200 for OK, 404 for Not Found etc. It provides an easy and consistent way to define and use HTTP status codes in Django REST framework or DRF.Here onwards we call DjangoRestframework as DRF.
The APIView class is a base class for creating API views that handles the HTTP request and response logic. It provides methods to handle various HTTP methods like GET, POST, PUT, DELETE etc.
The Response class is used to create HTTP responses from API views. It allows you to customize the response content, status code, headers etc. It provides a simple and intuitive way to create responses that follow the HTTP standards.
from rest_framework import status
from rest_framework.views import APIView,Response

class DumpItAPI(APIView):

    def get(self,request):
        items = [
            "apple",
            "mango",
            "grapes"
        ]
        response_data = {"datas":items}
        return Response(response_data,status=status.HTTP_200_OK)
This code defines a class named DumpItAPI which is a subclass of APIView. It has one method get which handles the HTTP GET requests to this API endpoint.
Inside the get method, a list of strings items is defined containing some fruits. Then, a dictionary response_data is created with a key named datas that contains the items list.
Finally, a DRF Response object is created using the response_data dictionary and an HTTP status code of 200 OK which is passed using the status module. This response object is returned as the response to the HTTP GET request made to this API endpoint.
In summary, this API endpoint returns a JSON response with a list of fruits under the key datas when an HTTP GET request is made to it. The response status code is 200 OK.
step 12) Where is URL / API
I wrote a bunch of code and tried to explain it, but honestly, who knows if it even works? I mean, where’s the proof? Can’t exactly guarantee anything here, you know?
Hey folks, my apologies for not providing enough clarity earlier. To make our API accessible through a URL, we need to create a URL endpoint that maps to our API view. In order to do this, we need to create an urls.py file inside our api app directory and define a URL pattern that maps to our dumpItAPI view. Hopefully, this clears things up a bit!
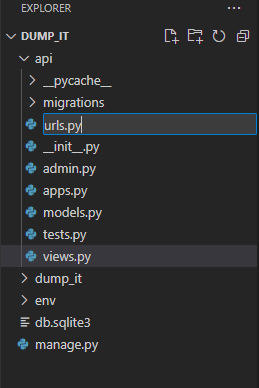
the urls.py will be like this an empty page

This code defines a URL path for a Django app. The path function is imported from the django.urls module, which is used to define URL patterns for the app.
The DumpItAPI view is imported from the app's views.py module. It is a class-based view that handles HTTP requests to a specific API endpoint.
The urlpatterns list is defined with a single URL pattern. It maps the root URL of the app (i.e. '') to the DumpItAPI view using the as_view() method. This means that when a user visits the root URL of the app, the get method of the DumpItAPI view will be called to handle the HTTP request.
In summary, this code sets up a single URL route for the app that maps the root URL to the DumpItAPI view. When a user visits the root URL, the get method of the DumpItAPI view will be called to generate an HTTP response.
from django.urls import path from .views import DumpItAPI
urlpatterns = [ path('', DumpItAPI.as_view()), ]
I can’t wait to see the amazing results!
Before we dive into the details, I have a quick tip that can make a big difference in getting your project up and running smoothly. I recommend adding the following line to your Django REST Framework project. With my word, it will work like magic. But if you encounter any issues, feel free to stop reading and troubleshoot before proceeding.
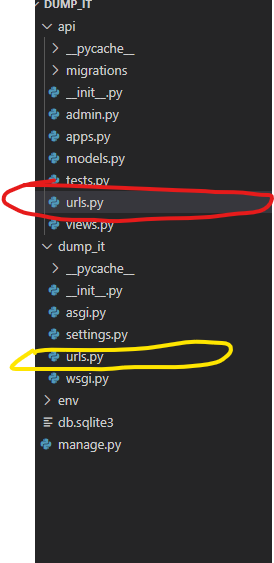
In a Django project, incoming requests from a browser first reach the project’s urls.py file, which then forwards the request to the appropriate app or URL. If you haven't specified where to forward the request, you can add a simple line of code to the project's urls.py file to direct the request to the correct destination. Think of it like giving directions to someone who is lost and needs to know where to go. By adding this line of code, you can ensure that requests are properly routed to the correct app or URL.
Think of it like telling someone how to get to a specific restaurant. You would provide them with the restaurant’s address, and then tell them which turns to make to reach the destination. Similarly, by adding a line of code to the urls.py file in your Django project, you are providing the program with the address (i.e. the URL) and telling it which app or view function to route the request to.
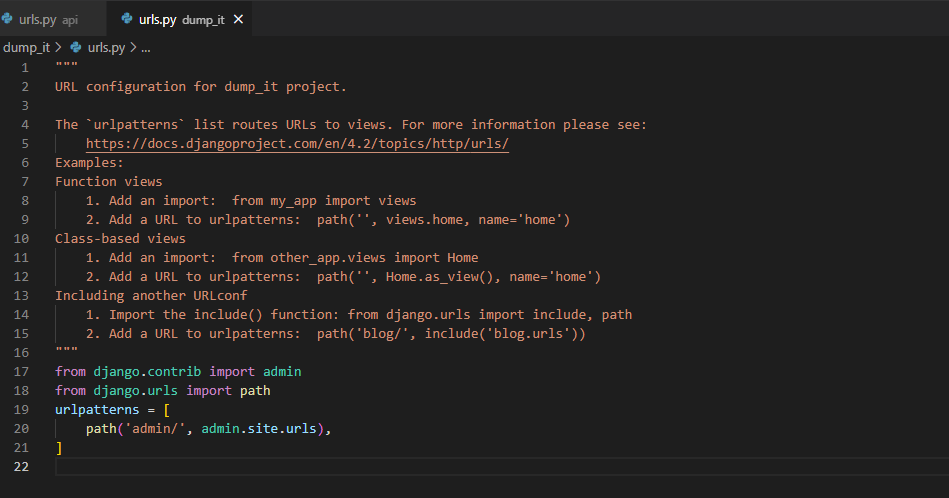
Note that Django includes a default urls.py file in every project, which you shouldn't modify. Instead, you can add the magic line of code to your project's urls.py file, which will direct incoming requests to the appropriate app or view function.


This code defines the URL routing for a Django project. The urlpatterns list contains two URL patterns:
The first URL pattern maps the admin/ URL to the Django admin interface. This means that when a user visits the example.com/admin/ URL, the Django admin interface will be loaded.
The second URL pattern maps the root URL to another URL configuration specified in the api.urls module using the include function. This means that any URL that starts with the root URL will be handled by the api.urls module. The api.urls module is expected to contain additional URL patterns that map to different views within the app.
In summary, this code sets up the root URL configuration for a Django project. It maps the admin/ URL to the Django admin interface and any other URL to the api.urls module. The api.urls module is expected to contain additional URL patterns for handling API requests.
from django.contrib import admin from django.urls import path,include
urlpatterns = [ path('admin/', admin.site.urls), path('',include('api.urls')) ]
now check your browser you can see the magic

before that you should know about an API Testing tool named Postman. How to use Postman
Let’s open API in Postman
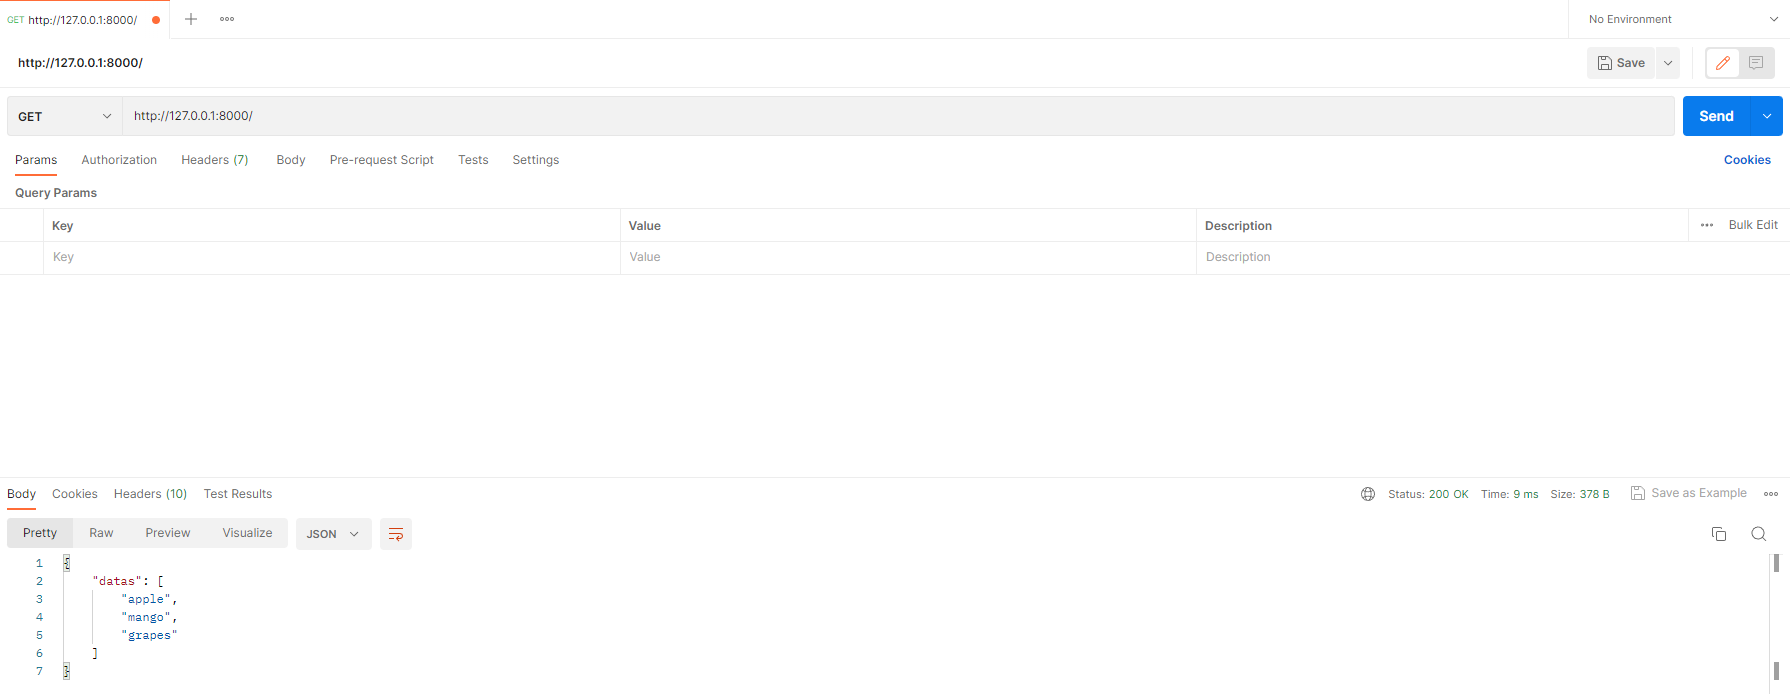
are you happy in writing your first api in lifetime i hope you enjoying it
now lets write an POST method

def post(self,request): response_data = {"response":"Hello Its Post method"} return Response(response_data,status=status.HTTP_200_OK)
write an url or api for this post method
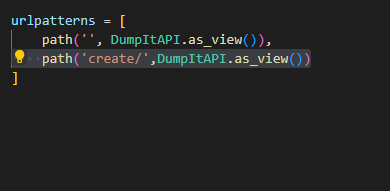
path('create/',DumpItAPI.as_view()),
API Response

lets look how to sent data from front end to backend

When a POST request is made to this view, the function retrieves the value of the name parameter from the request data using the “request.data.get” method, and assigns it to the “name” variable.
Then, it creates a dictionary object named “response_data” that contains a key-value pair with the key “name” and the value equal to the “name” variable.
Finally, the function returns a response object using the “Response” class from Django Rest Framework. This response contains the “response_data” dictionary as JSON data, and sets the HTTP status code to 200 (OK) using the “status.HTTP_200_OK” constant.

Response

Now that we’ve learned how to handle requests, we can add values to the database using the POST request. By default, Django uses SQLite as the database, so we’ll be using that in this tutorial
lets go to models.py and create an Item Table
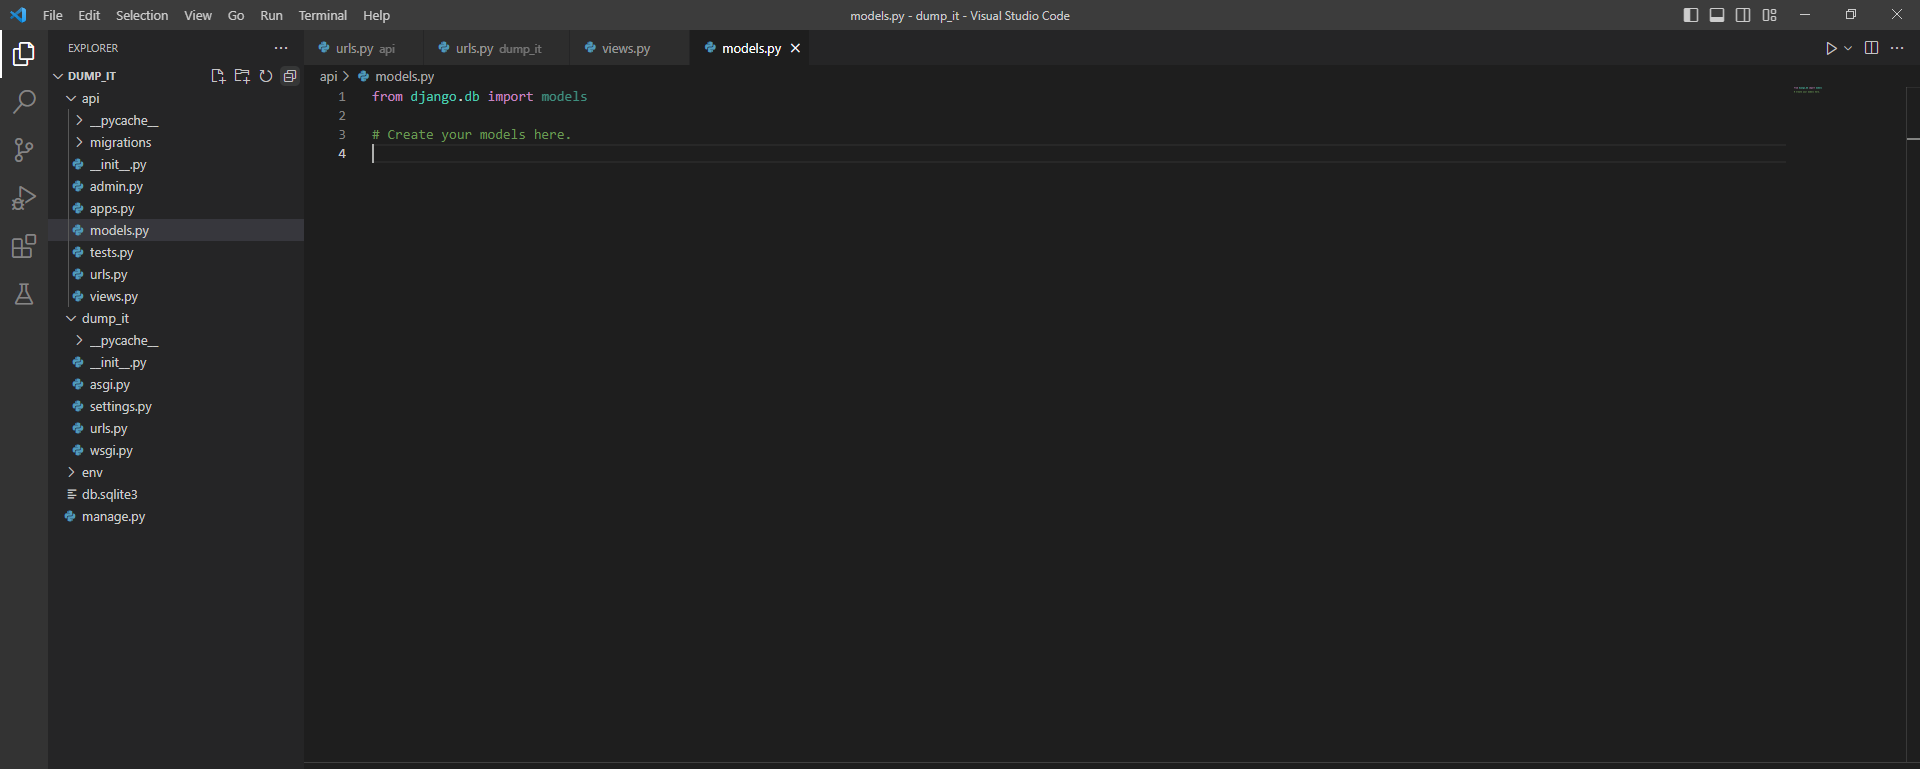
this is how we can see models.py so lets create an table named Item

from django.db import models
# Create your models here.
class Item(models.Model):
id = models.AutoField(primary_key=True) name = models.CharField(max_length=200)
this is our table so lets migrate the table

python manage.py makemigrations
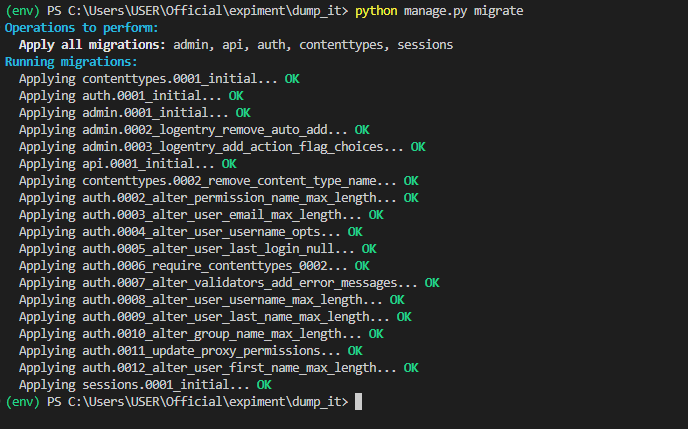
python manage.py migrate
so our tables are created
now import Item Model to views.py

from .models import Item
now lets write an code for add values to Items table

The function receives a POST request via the request parameter. The request.data attribute retrieves the data that was sent in the request body. Specifically, it gets the name attribute from the data using the get() method.
The Item.objects.create() method creates a new object in the Item model (presumably defined elsewhere in the Django project) with the specified name attribute. This saves the new item to the database.
The function then creates a dictionary response_data with a message that confirms the creation of the new item. Finally, the function returns a Response object with the response_data and an HTTP status code of 200 (OK) to indicate that the request was successful.
def post(self,request): name = request.data.get('name') Item.objects.create(name=name) response_data = {"response":"item Created"} return Response(response_data,status=status.HTTP_200_OK)
we are giving response in response_data = {“response”:”item Created”}
but how can we make sure the data is in table there are two methods
first method is look on database here we are using sqlite so we need to install sqlite viewer but in our need is to give response as datas so we can redefine our get request

The function receives a GET request via the request parameter. The Item.objects.all() method retrieves all items in the Item model (presumably defined elsewhere in the Django project).
The function then creates a dictionary response_data with a key named datas which contains the list of all items obtained from the previous step.
Finally, the function returns a Response object with the response_data and an HTTP status code of 200 (OK) to indicate that the request was successful.
but there is will be error when we open the browser just open an see that

I hope you see the error, but we can fix that by adding serializers for the Item Table
what is serializers ?
a serializer is a mechanism for converting complex data types, such as Django models, into Python data types that can be easily rendered into JSON, XML, or other content types. The serializer classes provided by Django REST framework are used to convert data to and from Python objects and various content types.
A ModelSerializer is a subclass of the Serializer class that provides a shortcut for creating serializers that deal with model instances and querysets. It is a great tool for generating JSON output directly from the database model, and for creating new model instances from JSON input.
To create a ModelSerializer, we need to define a class that inherits from serializers.ModelSerializer and specify the corresponding model class and fields that you want to serialize.
lets add serilizers.py in our app
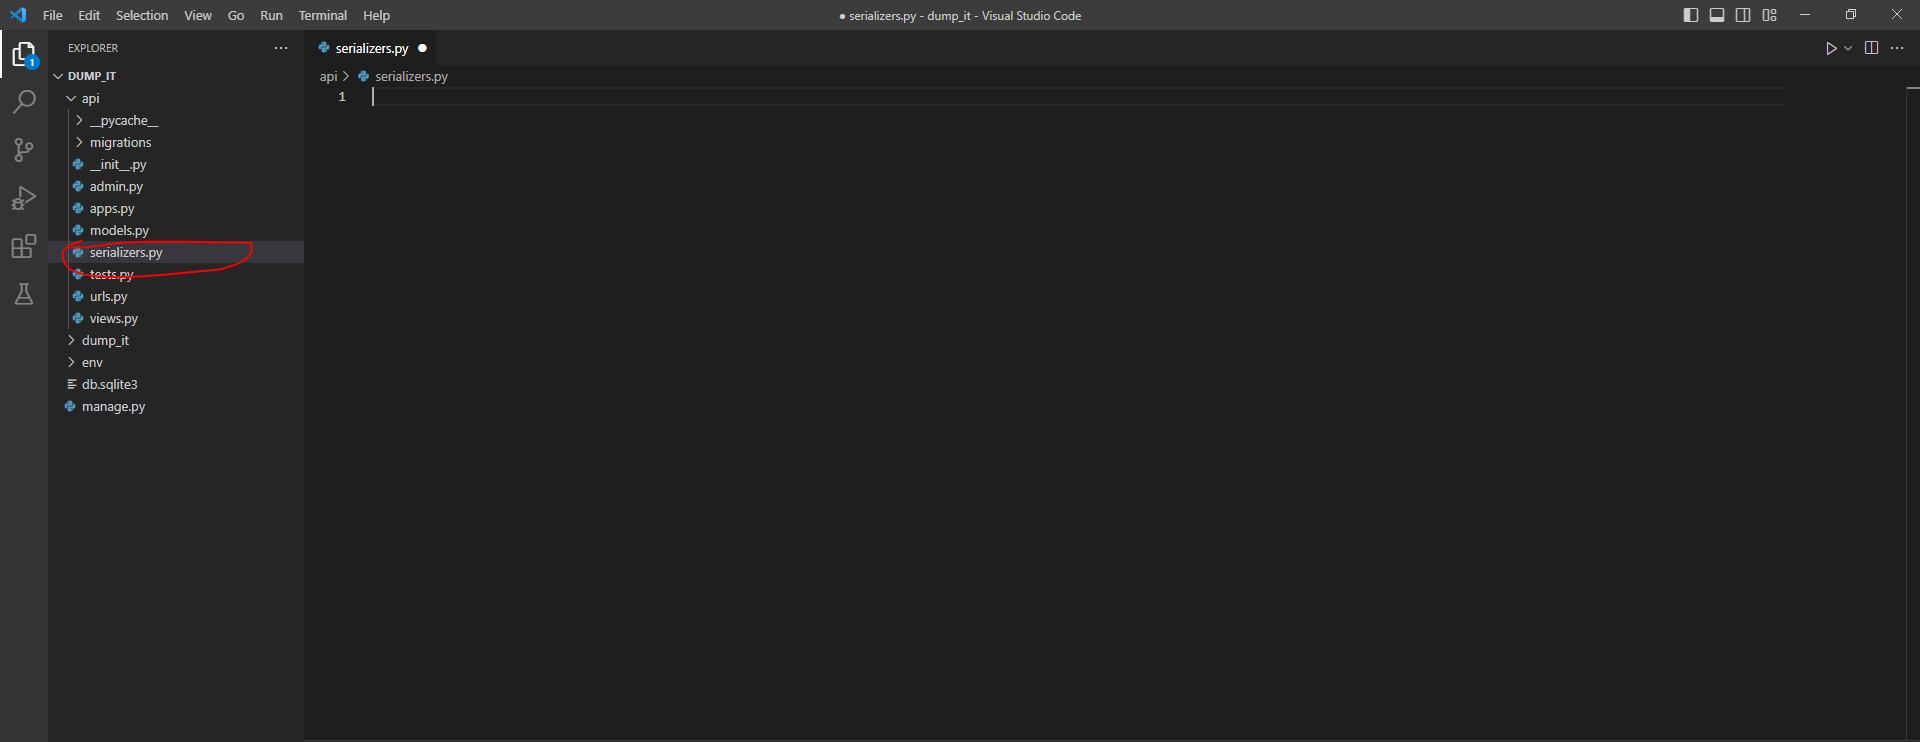
this how it looks when we create an serilizers.py from scratch
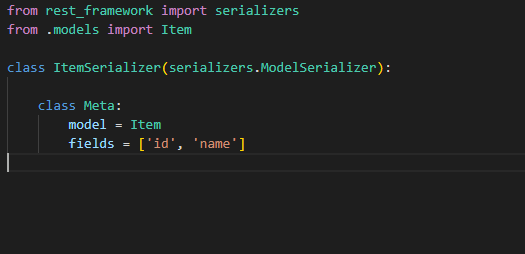
The ItemSerializer class is defined as a subclass of serializers.ModelSerializer. It specifies that the Item model should be serialized with only the id and name fields included.
The Meta class within the serializer class specifies the model to be serialized and the fields to be included in the serialized output. In this case, model = Item specifies that the Item model should be serialized, and fields = ['id', 'name'] specifies that only the id and name fields of the Item model should be included in the serialized output.
from rest_framework import serializers from .models import Item
class ItemSerializer(serializers.ModelSerializer):
class Meta: model = Item fields = ['id', 'name']
after creating Item serilizer import that into views .py

from .serializers import ItemSerializer

The GET method retrieves all instances of the Item model from the database, serializes them using the ItemSerializer, and returns them as a JSON response with a 200 OK status.
Here’s what each line of the method does:
items = Item.objects.all() retrieves all instances of the Item model from the database and assigns them to the items variable.
items_data = ItemSerializer(items, many=True).data serializes the items queryset using the ItemSerializer and assigns the serialized data to the items_data variable.
response_data = {"datas":items_data} creates a Python dictionary containing the serialized items data, and assigns it to the response_data variable.
return Response(response_data,status=status.HTTP_200_OK) returns a JSON response with the serialized items data and a 200 OK status.
By default, the ItemSerializer will serialize all fields of the Item model. However, in this case, only the fields specified in the ItemSerializer class's Meta class are included in the serialized output, which are id and name. The many=True argument in the serializer's constructor specifies that the serializer should handle a list of objects, rather than a single object.
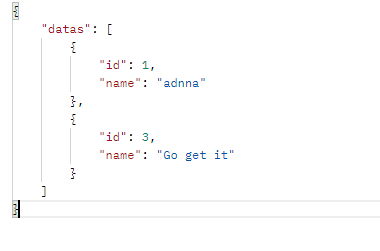
So, we have successfully finished two APIs: the GET API and the POST API. With these APIs, users can retrieve data from the server and also add new data to the database. However, there are still more API endpoints that we can add to make our Django REST API more powerful and complete. Let’s continue building
let’s move on to creating the API endpoint for editing data in our Django REST API
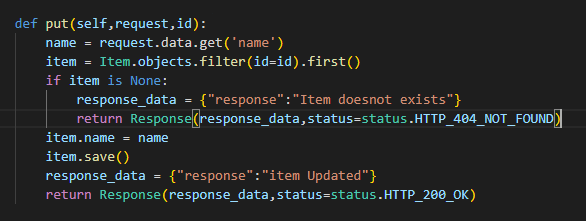
The function takes two arguments, request and id, where request is the HTTP request object and id is the unique identifier of the item to be updated.
The function first extracts the name attribute from the request's data using the get method of the data dictionary.
Then, it retrieves the item with the given id from the database using the filter method of the Item model and first method to get the first matching item. If the item does not exist, the function returns a 404 NOT FOUND response.
If the item exists, the function updates its name attribute with the extracted name value and saves the changes to the database using the save method. Then, it returns a 200 OK response with a JSON object containing a success message.
def put(self,request,id): name = request.data.get('name') item = Item.objects.filter(id=id).first() if item is None: response_data = {"response":"Item doesnot exists"} return Response(response_data,status=status.HTTP_404_NOT_FOUND) item.name = name item.save() response_data = {"response":"item Updated"} return Response(response_data,status=status.HTTP_200_OK)
Next, we need to define the URL or API path for our edit data API endpoint. This will allow clients to update existing data in our database table

This is a URL pattern in a Django web application that maps requests to the DumpItAPI view class for updating an item with the given id.
It uses the path function of Django's URL routing system, which takes two arguments: the URL pattern as a string, and the view function or class that will handle requests to that URL.
In this case, the URL pattern is 'update/int:id/', which includes the word 'update', followed by a forward slash, then an integer value for the id parameter, and finally another forward slash. The int:id syntax tells Django to expect an integer value for the id parameter.
The view class that will handle requests to this URL is DumpItAPI.as_view(), which is a method provided by the Django REST framework to convert a class-based view into a function-based view that can be used with Django's URL routing system.
urlpatterns = [ path('', DumpItAPI.as_view()), path('create/',DumpItAPI.as_view()), path('update/int:id/',DumpItAPI.as_view()), ]

In this step, we will update a record in our Item table where the ID is 2, and set its name to ‘hello world’.
The previous value of the record will be overwritten with the updated value
{ "id": 3, "name": "Go get it" }
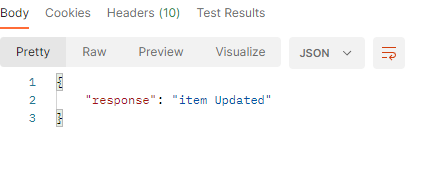
After updating the record in our Item table, we should take a look at our *GET *API endpoint. This will allow us to confirm that the update was successful and that the changes we made to the data in our database table are reflected in our API response. By doing this, we can ensure that our API is providing accurate and up-to-date information to our clients.

Having successfully updated our database table, we can now proceed to create the final API endpoint for our Django REST API which will allow users to delete records from the Item table. By enabling users to remove unwanted data, we can help ensure that our API remains organized and efficient.
Let’s now move on to creating the delete record API endpoint for our Django REST API.
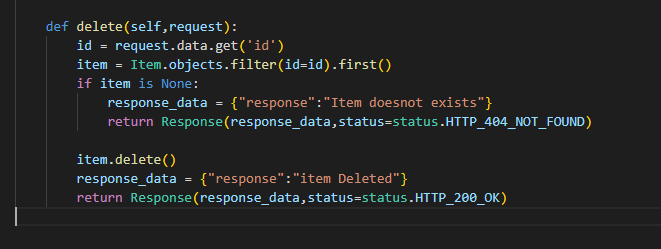
This method is responsible for handling HTTP DELETE requests, which typically are used to delete an existing resource on the server.
The method takes in a request argument, which represents the HTTP request made to the server. The method then extracts the id field from the request's data attribute using the get() method.
The id field is used to query the database for an instance of the Item model with the specified id. If no such instance exists, the method returns a HTTP_404_NOT_FOUND status code along with a JSON response indicating that the item does not exist.
If an Item instance is found, the method calls its delete() method to remove the instance from the database.
Finally, the method returns a HTTP_200_OK status code along with a JSON response indicating that the item was successfully deleted.
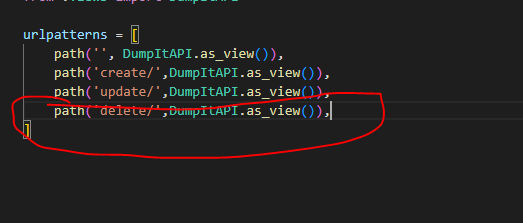
we need to add its URL or API path to our urls.py file. This will allow clients to send HTTP requests to the endpoint and delete records from our Item table. By properly configuring the URL or API path, we can ensure that our API is easy to use and accessible to our clients. Let's add the URL or API path for our delete record API endpoint to our urls.py file.


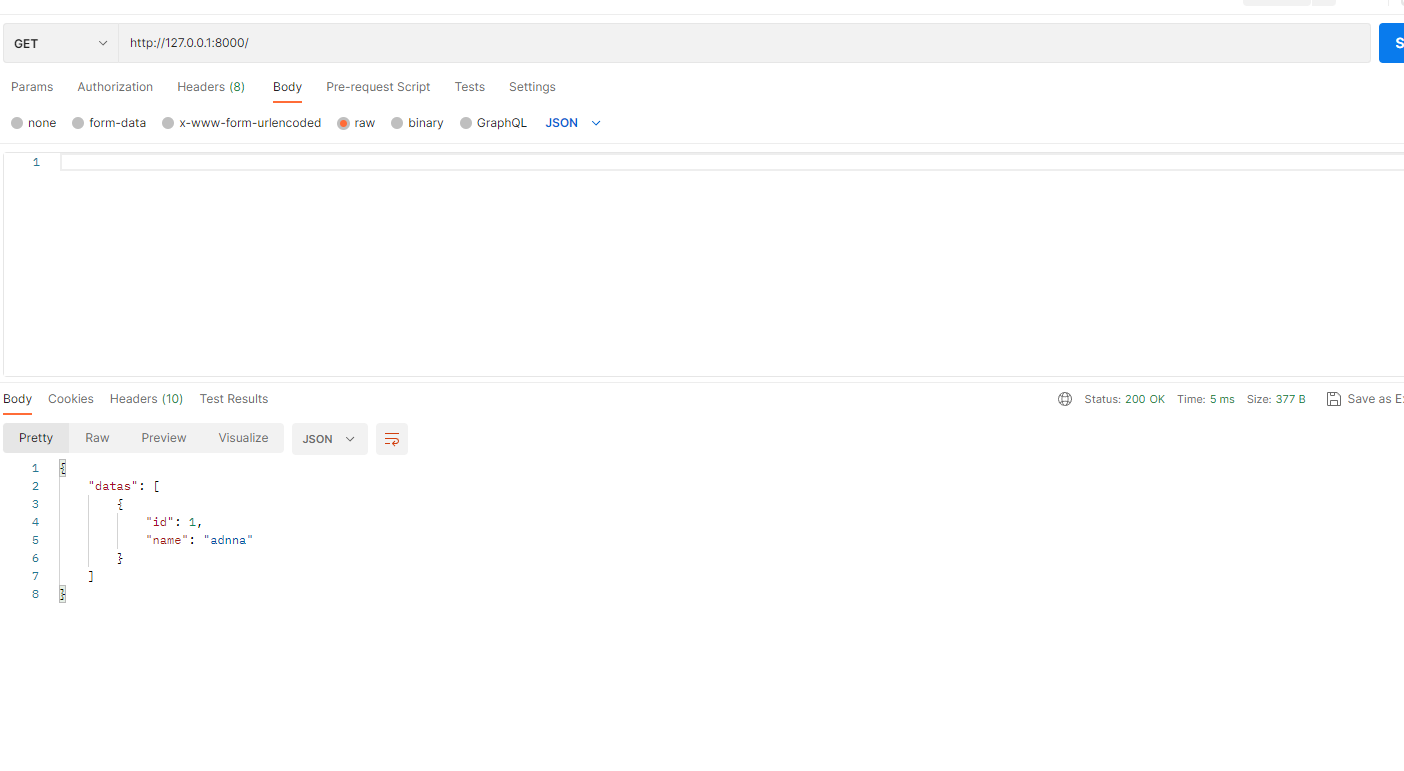
After deleting an item from our Item table using the delete record API endpoint our API will return a success message confirming that the item has been successfully deleted
Thank you for reading our article on building a CRUD app using Django REST Framework.
If you’re a beginner and need detailed Django tutorials in simple language, let us know in the comments. We’re happy to help anyone become a Django developer!